
VMware vRealize Automation 8 is a leap forwards and certainly a far cry from what we all knew as vRealize Automation 7.x. A new code base with a new look, if you have any familiarity with VMware vRealize Automation Cloud (formerly Cloud Automation Services) software as a service offering you may recognise some of it. Once I had it installed in my lab, for me, I wasn’t all that interested in deploying a vSphere virtual machine. I wanted to see how easy it would be to deploy a virtual machine to multiple providers; initially my on-premise vSphere environment, along with Microsoft Azure. Before you can start looking at the blueprint, you need to configure your connections to vSphere and MS Azure. The vSphere connection was configured, to a basic degree, through the wizard when I installed vRealize Automation 8. Configuring the MS Azure cloud zone proved to be a little more demanding.
In this blog post, I will show you the process for configuring MS Azure as a cloud zone within vRealize Automation 8 (specifically the Cloud Assembly service).
MS Azure Configuration
Note: I am going to assume that you have an MS Azure subscription and know how to login to it. If you don’t, best go find out before you try and follow this blog post!
Login to your MS Azure portal. On the Dashboard click the Subscriptions card.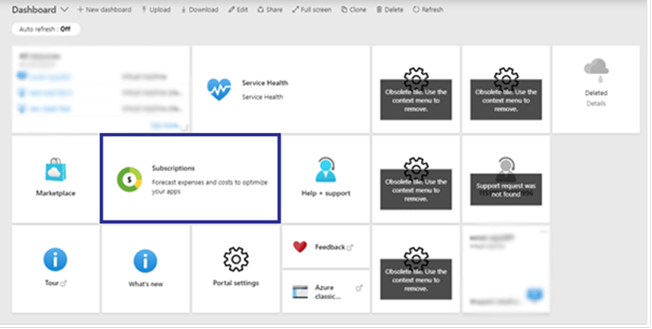
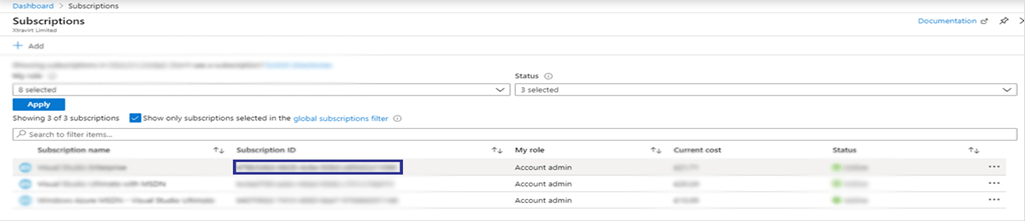
Within the Subscriptions screen, make a note of the Subscription ID that you want to deploy virtual machines and services into.
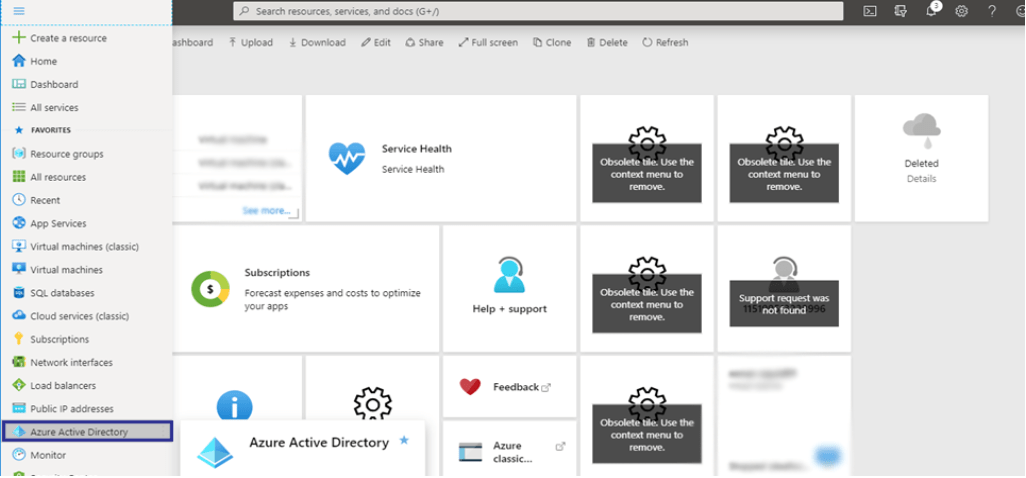
From the main menu [editor: click the 3 line burger menu in the top left corner] select the Azure Active Directory entry.
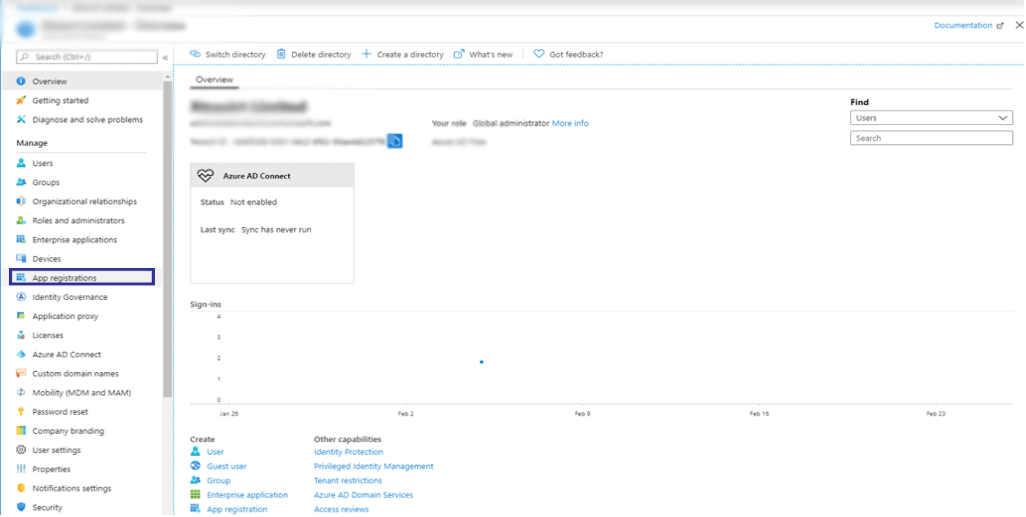
Click App Registrations. To enable vRealize Automation to carry out tasks within our MS Azure subscription, we need to grant it permissions. We do this, through registering an Azure Application.
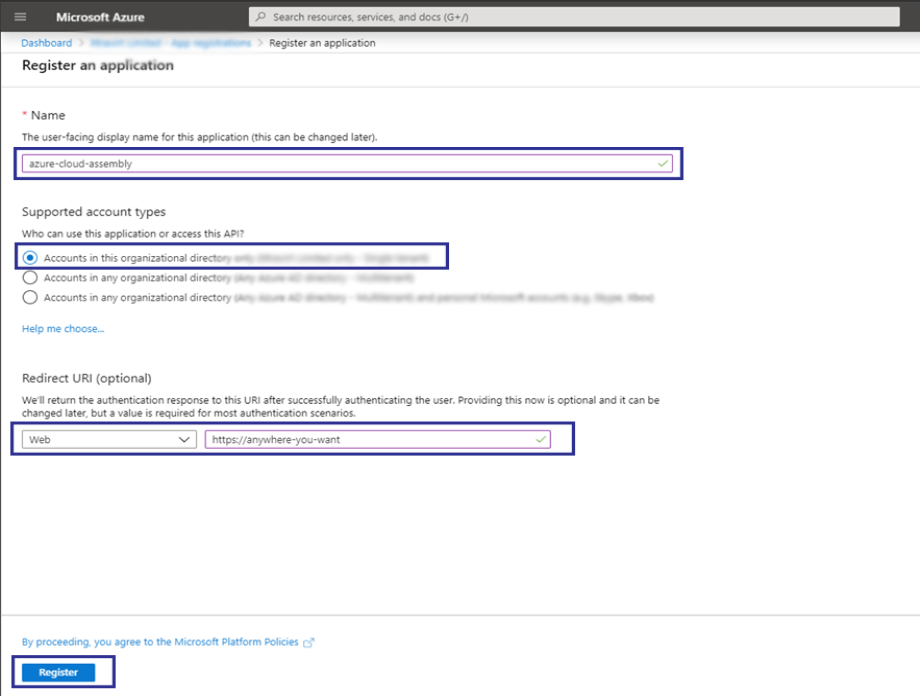
Register a new application. Specify a name, configure the Support account types (I used the first/default option) and set a Redirect URI. The redirect URI wont actually be used, so you can point this to any fictitious address you like, just as I have here. Finally, click the Register button.
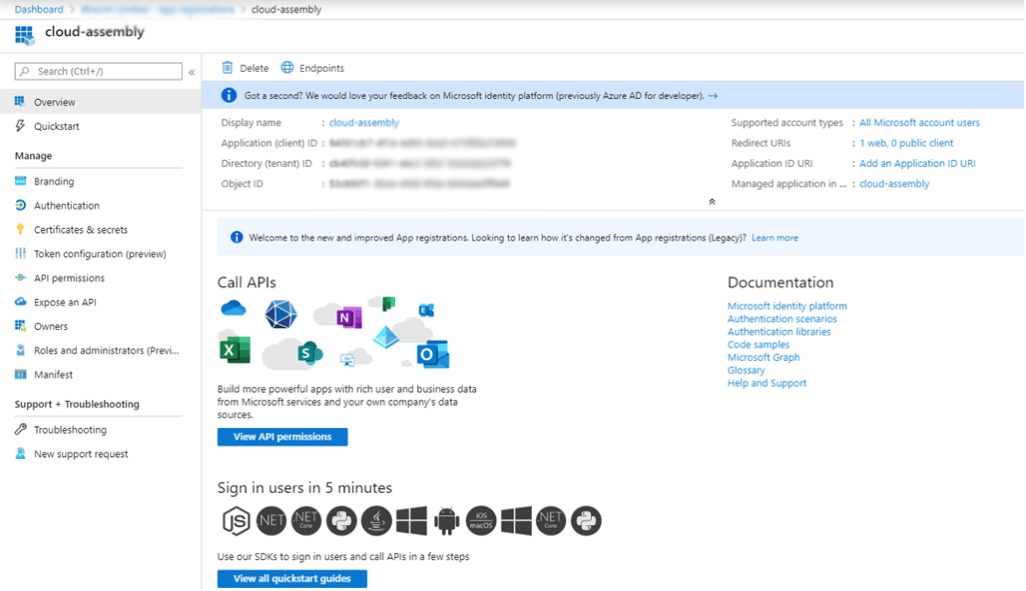
With our new application registered, make a note of the Directory (tenant ID). Click the Certificates & secrets menu entry.
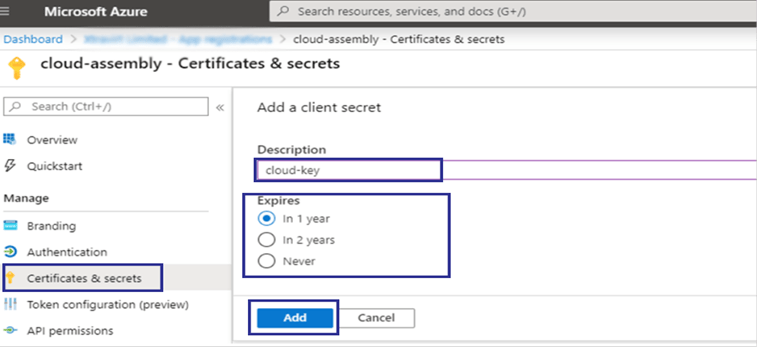
Add a new client secret. This will be used to allow vRealize Automation 8 to authenticate with MS Azure. Enter a description, select an expiry duration and then click Add. On the following screen, make a record of the secret. Once you leave this screen you will not be able to view it again.
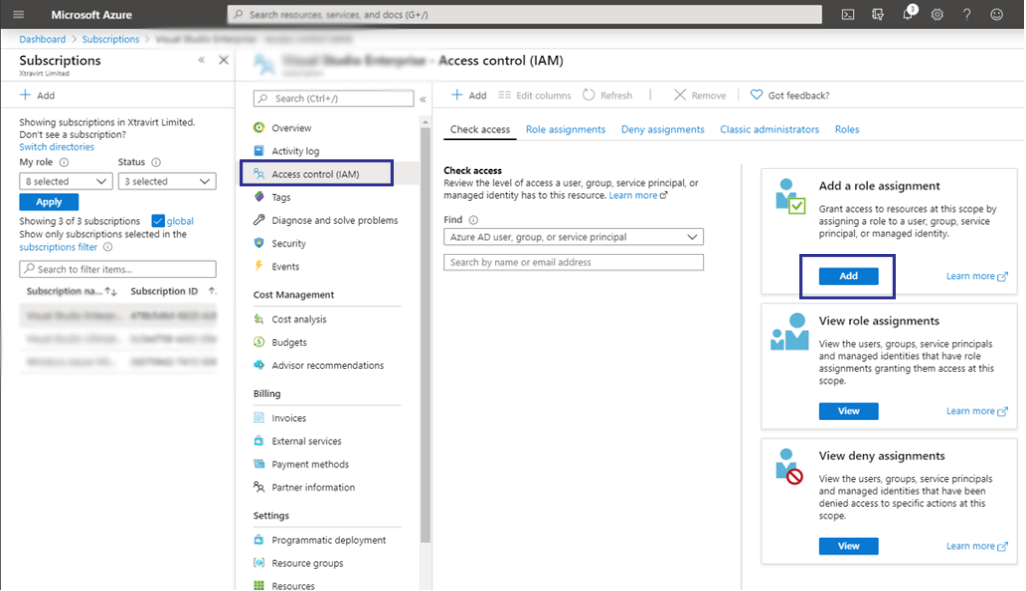
Navigate back to the main Dashboard and select the Subscriptions card. From there, select the Access Control (IAM) entry. For vRealize Automation 8 to be able to use this MS Azure subscription, we are going to have to grant our new application permissions to do certain tasks through roles. Click the Add button on the Add a role assignment card.
In the following screen, configure our application as a Contributor. Then repeat this process so that our registered application entry has the Contributor, Owner and Reader roles.
We are now ready to configure our MS Azure subscription as a cloud zone within vRealize Automation 8.