
Note: Please ensure you have read Part One in this series before continuing
Recap
In Part One we
Reader Activity Review
1. Became familiar with the Microsoft Graph API.
2. Tested the API using the Graph Explorer.
3. Became familiar with the Graph API Reference guide.
4. Registered an application in Azure Active Directory to enable us to securely communicate
5. Configured settings in VMware vRO to assist in authorisation with Office365
Assuming you have completed the above steps we are in a position to open VMware vRO and crack on.
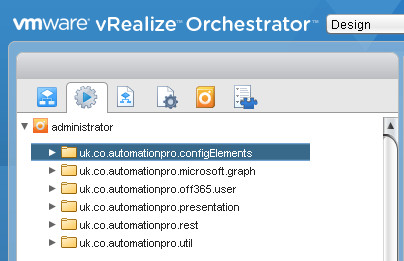
Use folders to organise your actions so they are easy to locate
Our First Action
Getting Organised
Through the course of this blog series we will create multiple folders to store and categorise our actions and workflows.
The first thing we are going to do is create an action to help us retrieve information from our configuration elements. When creating a folder for the action, I used my web domain name as the prefix for my action folder names. Not only does this follow the default standard it makes it a lot easier to find your actions.
Reader Activity – Create Folder
1. Log in to VMware vRO.
2. Select Design mode from th dropdown at the top.
3. Select the Actions tab.
4. Create a new folder called uk.co.automationpro.configElements
Now we have a folder for our action, lets create one. This first action is going to grab all of our information from our configuration element and construct a JSON object from it. We can pass this JSON object between workflow components as a string so we don’t have to make repetitious calls to obtain configuration.
Reader Activity – Create Action
1. Right click on the uk.co.automationpro.configElements folder
2. Select Add Action
3. When prompted to enter a name for the action enter ConfigToJsonTransformer.

If your actions need to return data then make sure you set the return type
Action Configuration
We will need our action to return the configuration item values back to our parent workflow.
By default, a new action won’t return anything, as its’ default return value is ‘void.’ We need to update the return value by specifying a return type. Since we are going to take our configuration item values and create a JSON object, our return value will need to be set to string. Whenever we pass JSON objects between actions or workflows, we do so by converting the object to a string.
Reader Activity – Configure Action Return Type
1. Edit the ConfigToJsonTransformer. action
2. Next to Return Type click the void link.
3. When prompted to enter a name for the action enter ConfigToJsonTransformer.
4. Click Accept
To ensure we can reuse our action, we will need to tell it which path we want to look for configuration elements under. To do this, we create an Input Parameter. A value will be passed from the parent workflow in to the action and will be mapped to this Input Parameter.
Reader Activity – Configure Action Input
1. Edit the ConfigToJsonTransformer. action
2. Click the Add Parameter button on the toolbar.
3. A new entry arg0 will be created in the top half of the editor window. Click on the arg0 text link.
4. Set the attribute name to path
5. Click Ok
Our Actions Code
The final step is to add our actions code. The code will use the Input Parameter to get the path to the Configuration Element we want to get configuration from. The code will manipulate this into a JSON object. We will then return this JSON object as a string, back to the parent workflow.
Reader Activity – Add Our Action Code
1. Edit the ConfigToJsonTransformer. action
2. Copy the code from below into the code window.
3. Click Save and Close.
var category = Server.getConfigurationElementCategoryWithPath(path);

if (category == null) {
    throw "Configuration element category '" + categoryPath + "' not found or empty!";
}

var elements = [];

for (i = 0; i < category.configurationElements.length; i++) {
  var jsonString = "";
  var configElementName = category.configurationElements[i].name;

  for each (var attr in category.configurationElements[i].attributes) {
    jsonString += '"' + attr.name + '"' + ":" + '"' + attr.value + '",';
  }

  var finalString = '"' + configElementName + '": {' + jsonString + "}";
  elements.push(finalString);
}

jsonOut = "{" + elements.join(",") + "}";
System.debug("ConfigurationJsonResponse: " + jsonOut);
return jsonOut;
As you can see, the code takes the path and retrieves the category storing it in the category variable. It then iterates over the configuration elements under the path and obtains each of the attribute names along with each of their associated values. The results are stored in an array called elements. We then pass out a string which contains all of the information, formatted in JSON, named jsonout.
Next Steps
We have now successfully created our pre-requisite action to obtain configuration values from our config element. We have stored this action in a folder location so it is easily locatable. In Part Three we will create our Authentication Action and perform our first API call against Office365, obtaining our Access Token.